How To Create WooCommerce Coupons for Mailchimp Automatically
If you haven’t already, you’ll want to check out the simple process for creating coupons in Urgency Coupons for Mailing Lists PRO, which you can find here. Once you’ve done that, come back here and learn how to set up Mailchimp to start sending your personalized WooCommerce coupons to your list subscribers.
MailChimp can send updates to your site using Urgency Coupons when a person subscribes or unsubscribes from a particular list, so you can use the subscribe action to generate a coupon on your site. You can then use the MailChimp automation process tosend an email to your subscriber stating that there is a coupon that has been created specifically for them. You can do this instantly or wait any number of days.
Tip: This webhook will also run if you move a person to a different list in your MailChimp account.
The important thing to remember is that if you want to send an email five days after they sign up, saying that they have a coupon which will expire in five days, you’ll need to set the coupon expiration date at 10 days. (This is because on day five they will be notified about their coupon. At that point, five days will be remaining before the coupon expires.)
1. Create Your Coupon in Urgency Coupons
Step 1: Create Your Coupon in Urgency Coupons
You’ll need to create a coupon in the WordPress Dashboard under Urgency Coupons for Mailing lists > All Urgency Coupons > New Coupon.
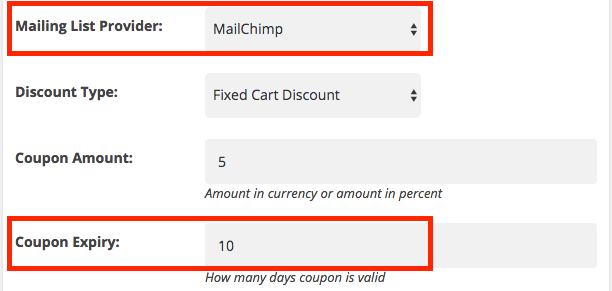
Make sure to change the Mailing List Provider to “MailChimp,” and fill out the other details as you see fit.
Make sure to set the expiration in number of days correctly – the coupon is created when a subscriber is added to your list. For example, if you want to send an email to that subscriber in 10 days letting them know they have a coupon that expires in three days, you would need to set the expiration at 13 days.
Don’t forget to copy the Webhook URL you’re shown after creating the coupon. You’ll use this in the next step.
2. Open the Mailchimp list
Log into your MailChimp account, go to the Lists section, and choose the list you want to use.
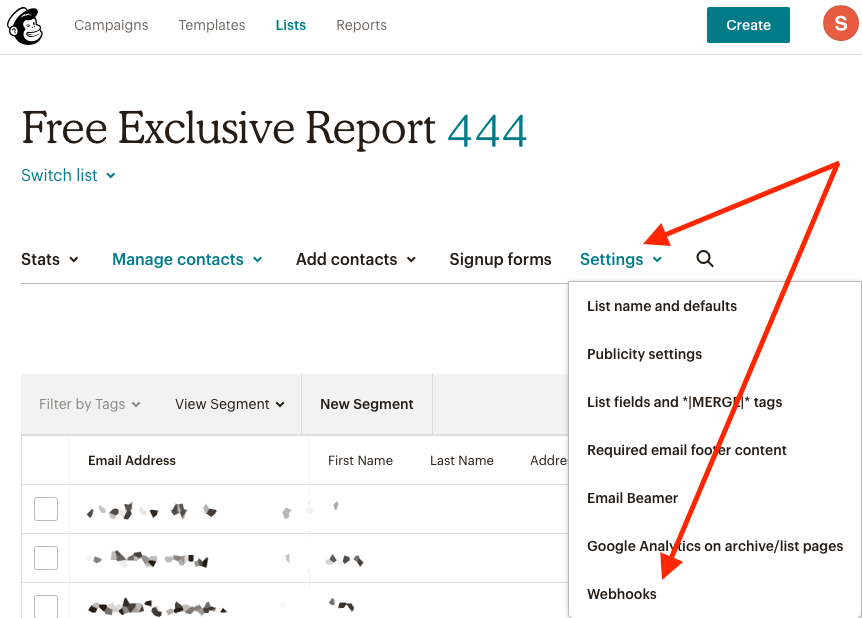
3. Create a new webhook
Click Create New Webhook.
In the Callback URL field, paste the webhook URL you copied in Step 1.
Under “What type of updates should we send,” make sure to only check “Subscribes.” Everything else should be unchecked.
Beneath “Only send updates when a change is made,” check all boxes: “By a subscriber”; “By an account admin”; “Via the api”
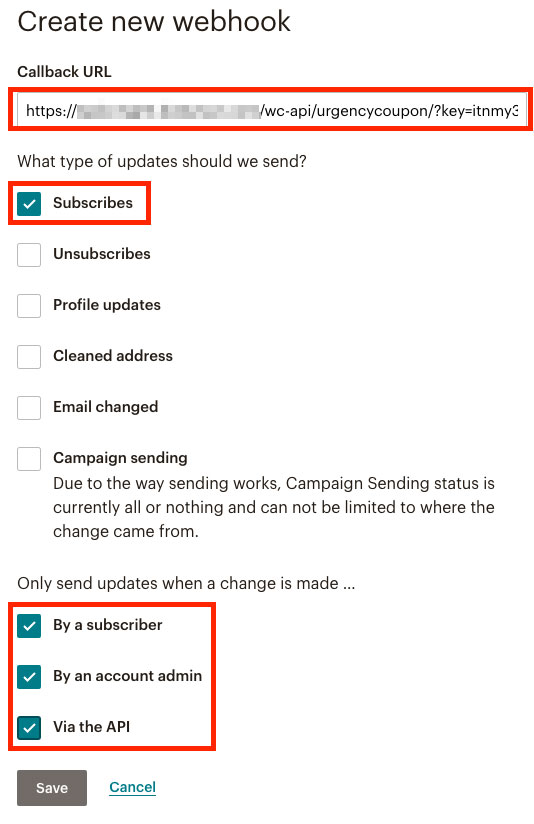
Of course, you’ll need to click “Save.”
You’ll then see your webhook listed under “Configured webhooks.”
4. Set up an automation tied to this list
In MailChimp, switch to the Campaigns tab. You probably already have a campaign set up, but if not, you should add one.
The important thing is to have an email where the subscriber is notified of their coupon code.
A typical campaign usually has a welcome email the subscriber receives automatically, with a follow-up email that contains the coupon code which comes some days later.
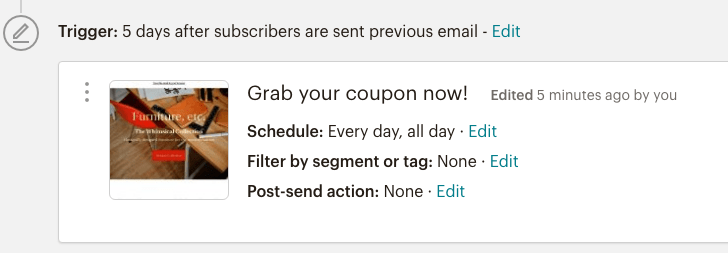
For example, set a trigger for five days after the first, immediate email is sent:
5. Personalize the email
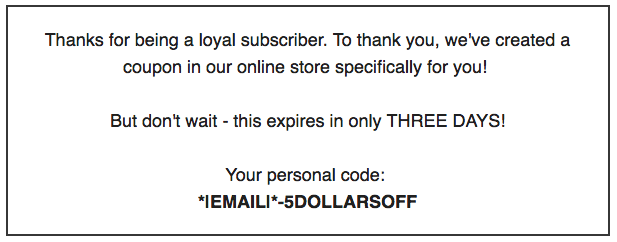
In the email announcing the coupon code, use the MailChimp email merge tag followed by the coupon code suffix you created in Step 1 when creating your coupon. For example, if your coupon code suffix is -5DOLLARSOFF, you would use this as your text in the MailChimp template:
*|EMAIL|*-5DOLLARSOFF
Example text within MailChimp:
6. Finito!
And that’s it! When a subscriber signs up for your list, the coupon will be created. You’ve also added an email which will be sent to the subscriber letting them know of the coupon they can use.
Again, you can do more complex scenarios as well – if you have an automation that moves a subscriber to a different list after a certain number of days, you can add a webhook to that list which will then run and create a coupon, and you can attach campaigns to that list.
Please reach out if you have any questions on getting this set up on your site – we’ve used it on a number of client sites with great success!
